Seeing Light at Night
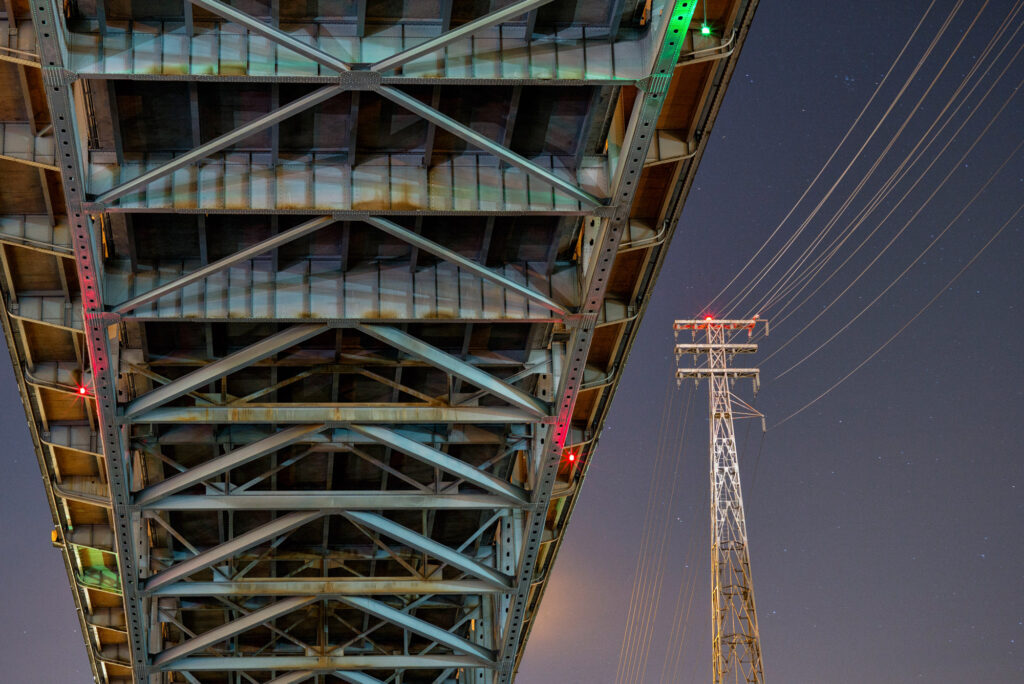
Just because the sun has gone down doesn’t mean its time to put the camera away Whether I’m out in nature or wandering a city, I am just as likely to be spotted with my camera and tripod close by at night as I am by day. Not only do you tend to have places that by day might have hundreds if not thousands of people roaming around and taking similar photographs to yours, you also have an opportunity to see and capture light differently than most people ever will. After all, no matter what time it is you are creating an image; you are only capturing how the light falls on your subject. In fact the word photography literally means to draw or write with light. At night subtleties of light and color are much more pronounced and the dynamic range of your scene (the difference from bright to dark areas) can be closer than daytime creating a surreal look that leaves your viewer captivated and often a little confused at the image they are presented with. Both of these images were taken at the same location a couple of days apart, and there is a dramatically different look to the same subject matter. In both images, the moon assumes a roll like the sun would in a daytime landscape. In the image above, clouds add to a sunset like effect and soften the light falling on the foreground. Only when the eye travels towards the stars in the upper portion of the image does it become clear that this photograph was taken at night. In the image to the left, a mid to high aperture setting (in this case f8) creates the starburst exploding from the moon giving it a sun-like appearance. With no real cloud cover to speak of, the harsher less diffused light on the foreground creates much more contrast with the shadows giving a pronounced separation to the canyons and valleys. In an urban environment, you have even more to consider Here the moon phase won’t make as big of an impact as the differing colors of light present in a city. If you take a close look at the streetlights around at night, you will see ranges of yellows and oranges to more white and even greenish lights. Sometimes you have cloud cover to reflect the city’s ambient light and other times on a cloudless with nothing to bounce light back towards your lens you’re left with a black void behind your subject. All of these elements will play into your final image. The surrounding lights are casting a blue hue on some of the steel supports for the highway above while the other side is bathed in a warm yellow that contrasts against the blue. The red and green lights on the bridge and tower still have fine star points despite the lens being shot wide open. Had I used a higher aperture they would be even more defined. Those same red and green lights add all sorts of colored accents to shadows under the bridge. The high-tension wire’s frame is illuminated by the orange sodium vapor lights on the highway along with the more white headlights of the oncoming cars traveling above. This creates brighter spot that draws the eye to a simpler counterpart to balance the busy subject matter of the bridge. During day, this bridge and these power lines look just like that, a bridge and power lines. After the sun has set, this bridge scene explodes with color and subtleties that can only be captured at night. The direction of light and shadow Like daytime, at night the direction of light plays into the mood you are trying to create for the viewer as well. In the image on the left an aperture of f7.1 was used to turn the moon into a sun-like burst between the Moai of Easter Island. Over the 20 seconds this image took to expose quick moving clouds pass to create a streaky look. By exposing for more of the clouds than anything else in the image, the ancient statues take on a mysterious silhouette in front of the wispy clouds. At the top of the image the pinpoints of stars bring a motionless balance to the Moai. By opening my aperture to f4, raising the ISO a bit and placing my light source (the moon) at my back, the same subject takes on a very different feel. Now the details of the statues become visible along with the foreground and stars. With the same shutter speed of 20 seconds, the clouds keep their wispy character.
Mountain Goats Usually Win in a Game of King of the Hill

After wrapping up a trip to the amazing Washington Coast with a fellow photographer and a model, we decided to stop by Hurricane Ridge in the Olympic National Park. This National Park is high in the Olympic Range with sweeping views of the surrounding mountains, the salt water of The Strait of Juan de Fuca and the southern coastline of Vancouver Island in Canada. This is a place I have been to quite a few times and while my friends went off to explore and shoot on their own, I set off to a high viewpoint to film a time lapse of the clouds forming over a valley. This park is not only a beautiful alpine vista, but it’s home to black tail deer, black bear, mountain lions and mountains goats just to name a few. The first three are endemic to the area while the mountain goat, although endemic to the nearby cascade range, is an invasive species introduced to the Olympics in 1925 more or less for the novelty of having mountain goats there. Over the years, especially in the last decade or so there has been an increase in the population, and also an increase in the aggressiveness towards humans in the area from the goats. In 2010 a man was fatally gored by one while eating lunch on a hike in the Olympics. He was able to get his hiking companions out of danger and tried to wave the goat away. The goat speared him in the thigh, severing his femoral artery and then it stood over the man until he bled out. One of my greatest passions is wildlife photography and I have encountered mountain goats in the wild before in a few different areas. When photographing any animal, whether it be a chipmunk or a rhino, you want to respect the animal and give it space. Once the demeanor of the animal changes, it’s too late. It feels harassed and even if it doesn’t run away it’s now on guard and you won’t be getting any natural looking uninterrupted images. This is also the threshold where you can get yourself into some serious trouble. It is important to research the behaviors of animals a bit before you put yourself in a situation with a large or dangerous animal. That way you can hopefully get a feel for when things are about to go bad. That being said, not every animal is easy to decipher. Some animals are very obvious in their intentions while others can become aggressive at the drop of a hat. As humans we tend to anthropomorphize and project our feelings on animals. The only way to truly get a feel for an animals behavior is to spend time in the field observing your subject. For evidence of this look no further than the string of attacks recently in the news of people getting too close to animals at Yellowstone or trying to take selfies with dangerous animals. Two people were killed recently while trying to take a selfie with a wild walrus. A walrus, I mean come on, that is Darwinism ladies and gentleman! Let’s get back to the matter at hand here. The time lapse that I intended to take was going to be 720 images over the course of an hour. That equates to an image every 5 seconds. I use a Dynamic Perceptions Stage One rail system to move the camera between frames and it also triggers the camera for me. I had this traveling across 80 inches of rail over the course of the hour. After setting it up I headed about thirty feet away to sit in the shade and enjoy the beautiful views while my time lapse was being shot. Over the course of the next half hour I answered the standard questions people have as they walk by and see an elaborate camera set up that if foreign to them like, “What is that thing, a professional selfie stick?” Yes, two separate people more than twenty minutes apart asked that. Just about half way through my time lapse a hiker that I had just seen a couple minutes before head up a trail was returning back down my way. He approached me and said, “There’s a large aggressive mountain goat up there herding people off the trail and he’s heading this way. Can you tell people so they don’t go up there?” I wasn’t planning on going anywhere for another half hour or so, so I gladly accepted the responsibility of trail supervisor. About a minute later I caught site of the goat and he certainly was a big one! He was still about a quarter mile away so I watched from my shaded perch as he weaved in and out of the tree line. A moment later I saw another adult followed by a kid. Now this started to make sense. The large male was clearing the way for the babies that were following behind. Sure enough a moment after that a third adult followed by a second kid joined the group. As I watched them congregate still in the distance I did have to thwart the efforts of a few intrepid hikers that wanted to keep on their intended path. With about ten minutes left on the time lapse the big male started to head down my way. A couple from the UK that were traveling through the states had joined me as we watched the large animal slowly make its way towards us. When he started to get a couple hundred yards away it became fairly evident that my camera gear was going to be along his path or at least closer than I wanted it to be. I went up and grabbed the camera off the time lapse rig so if he bucked it off of the 500ft cliff it was perched over, at least I’d still have my camera. When I looked back he had closed off my
Street Walker On The Las Vegas Strip
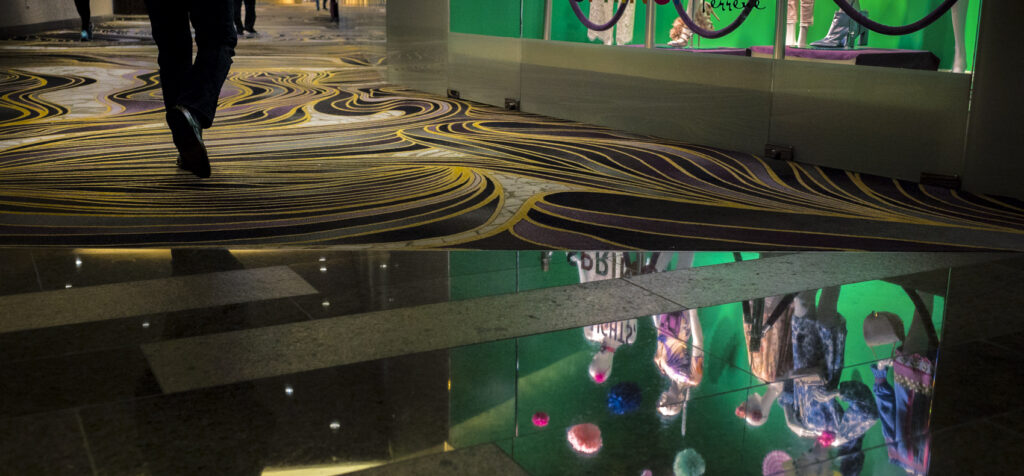
Las Vegas Street Shots One of the parts of my job that I love the most is creating private, one on one workshops for people to fulfill a photographic adventure that they have been thinking about for quite some time. One recent workshop was in Las Vegas dealing with the topics of street photography and…read more.