Night in Death Valley – A Reflection
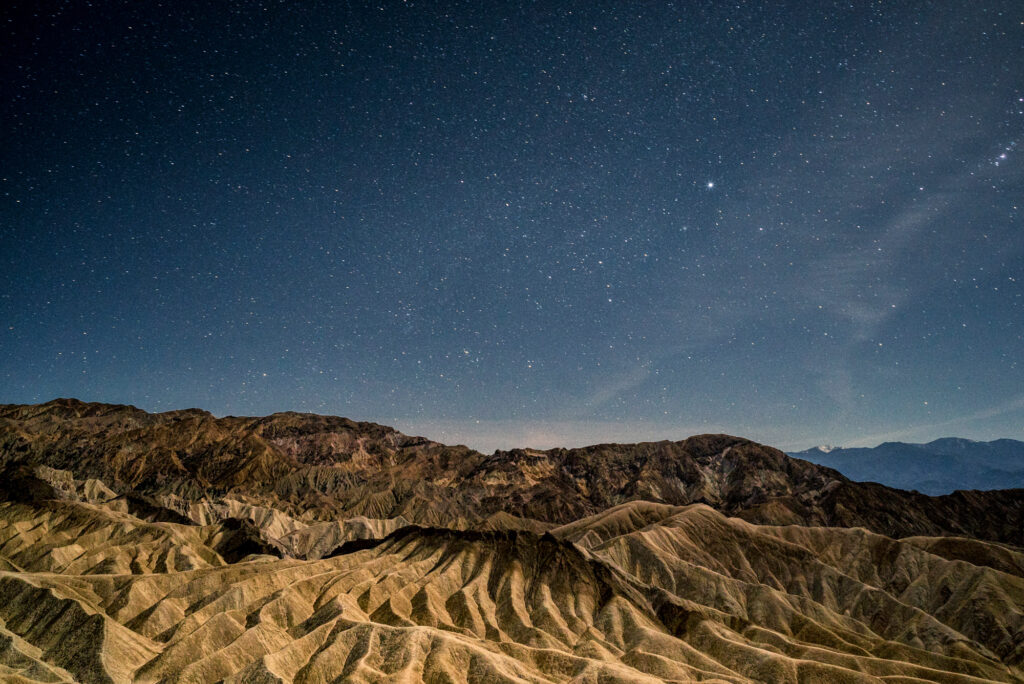
Last week I wrapped up my annual Death Valley workshop. Even though this workshop mostly deals with night photography, we do still get out for a bit during the daylight. This year we were lucky enough to have the workshop fall on the tail end of one of the largest super blooms in a century at Death Valley. Despite being one of the driest places on the planet, when rains come through at the right time in the late winter it can trigger dormant wildflower seeds to start to germinate. Regardless of the year, you can almost always find a random wildflower on the valley floor during spring. This year the whole floor was carpeted with blooms. Whether the park is carpeted in flowers or not, Death Valley is still one of my favorite national parks. I have been traveling there for 7 years now in the spring and still have seen less than half of this vast expanse. The area was mostly used for mining of borax and silver (although there was more spent on silver mining than made here). Once the mining boom started to fizzle out around 1915 companies were pulling out or going bust by staying. Pacific Coast Borax turned it’s crew headquarters into the luxury hotel, now known as The Furnace Creek Inn, which started the tourism boom to this desolate area. In 1933 President Herbert Hoover pronounced almost 2 million acres as a National Monument. It wasn’t until Halloween 1994 that another 1.3 million acres was added and the area was designated a National Park. No matter how many times I have been, there is always something to explore or photograph at Death Valley. There is no doubt in my mind that I will continue to return and explore this amazing landscape. I think I’ll keep my visits to the spring and summer though to avoid those 120f degree temperatures!
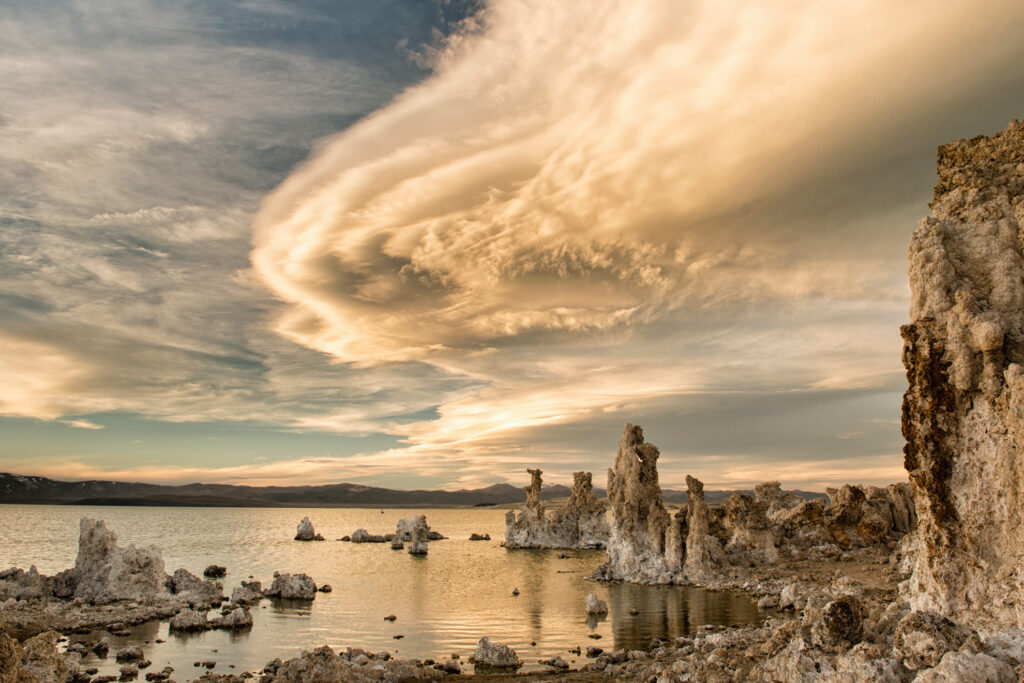
Random Road Trip Discoveries

When driving between Las Vegas and Los Angeles, you may notice three incredibly bright towers on the north side of the highway. These gigantic contraptions are known as Concentrated Solar Power or CSP. By directing immense amounts of light off of mirrors to a single source, heat energy is generated and then creates steam to power turbines. At this time though, the future of CSP is in danger. There are large arrays in Spain, the Middle East and still a couple more planned for production, but the average plant is either loosing money or producing far under the expected outputs. With the price of photo voltaic cells (standard solar panels) coming down, the cost per mega watt isn’t really panning out. Regardless of their future viability as an energy production means, they still make for some great photographic subject matter!
Whoops, I Ended up in Las Vegas on St. Patricks Day

After the completion of my annual Death Valley workshop on night photography I had to head to Los Angeles to teach a few classes for Samy’s Camera and also speak to a camera club in Santa Barbara. When I was about to leave Death Valley I realized I would be heading into LA at the height of traffic. If you have been to LA, you know how much you want to avoid this if possible! After asking Siri, I figured out that it would only add an hour total to my trip if I headed to Las Vegas for lunch. There is a great Mediterranean restaurant in the Cosmopolitan that has a 3 course set lunch for about $25 that could be one of the best food deals in Las Vegas (I am a serious foodie, I just don’t burden you with pics of meal that passes through these lips). Anytime I am passing through Las Vegas during their lunch hours I make it a point to head there. Once I finished my meal and started to head to my car to commence my drive to LA, I noticed an abundance of people wearing green. Now, I don’t drink and I was in the desert for a week and a half previous to this with next to no outside communication, so I had no idea that I stumbled into Las Vegas on St Patrick’s Day. As a street photographer I felt I had a duty to wander around and capture some life happening. I also ended up filming a few time lapses through the evening, but the shot at the top of this post stood out to me after the night was over. At first I of course noticed the sea of green in front of me and that the only person looking into the lens was wearing a pope hat. After I showed the image to a friend she notices that out of all the “happy people” wandering around Las Vegas on this tipsy holiday, only two people in the background of the image are smiling. Now I’m not really sure if this is a reflection of the true psyche of the average drunken Vegas wanderer or just a coincidence at the time I snapped the shutter, but it certainly is a picture that is worth a thousand words.
5 Tip for Better Portraits (Even With Your Phone)

When photographing our friends and family (even with your phone), there are some simple rules that you can follow to help make your photos stand out. 1 – Don’t Let Thing’s “Grow” from People One of the more common mistakes I see in photographs of people are objects like telephone poles or trees “growing” out of people heads. Being aware of your background is crucial to any photograph, ones of your friends or family are not exempt from this rule. When taking pictures of people we often get lost in trying to get everybody in the shot, ignoring the background entirely. Now that you are looking at your background, try and find a placement that a tree looks like it is taking root in the ground rather than your friends head. 2 – Try Indirect Lighting Sunlight can appear very harsh in a portrait, especially if there are heavy shadows in your image. Try placing your subject(s) under a tree or an awning. This will help even out the lighting on your subject and depending on how bright the scene behind you (the photographer) you may even have a catch light in the eye. If you photograph closer to sunrise or sunset during the time known as the golden hour, the difference from light to shadow is less intense. 3 – Avoid Having Your Subject Looking Into the Sun As an instinct, I think people generally want to put a whole bunch of light on their subject. Having everyone in your shot squinting into the sun doesn’t result in a good image, nor is it a pleasant experience for you subjects. If possible, try the above step, but if you are in a wide open area and can’t get to cover to help diffuse the light, try turning your subject to the side a bit. Both your image and your subject will be better off for it! 4 – Make Sure Your Subject Doesn’t Get Lost in the Scene Unless you are trying to capture the grandeur of a landscape with your subject included in the scene, move in on your him/her and eliminate a lot of the background. Having a person or even a few floating in the middle of the frame isn’t doing anyone any favors. 5 – Shoot for People’s Personality In a portrait you are photographing a person not an inanimate object, make sure your image reflects that. Rather than starchy poses and unnatural body positions, let your subjects be themselves in your images. Of course if you are trying to achieve a formal portrait of your family, this might not be the best advice to follow, but otherwise let the people in your image show who they are. Not only will they be more willing to stand in front of your camera more often, but the images will evoke more memories of the way people are rather than just what they look like.
Photos and Art…Taking Pictures in a Museum
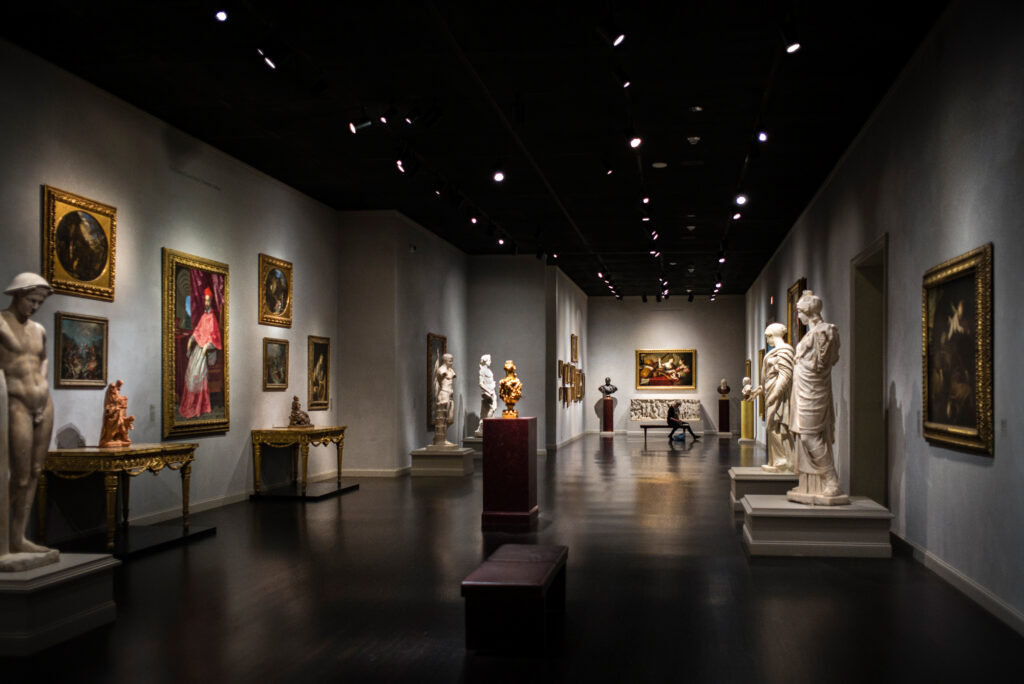
I am an avid museum goer. I have a membership to the Seattle Art Museum, and try to visit as many different museums as possible while I am traveling. In the past month I have been to The Seattle Art Museum (twice), the Portland Art Museum, San Francisco Fine Arts Museum, The Martin Lawrence Gallery in Las Vegas (not a museum but more fine art on display than most museums), The UCLA Hammer Museum, The LACMA, The Petersen Automotive Museum (rolling art), The Broad and The Getty. As long as it is post 1700-ish (religious or portraits of kings or random wealthy people are not my bag) I can stare into paintings all day. I can peer in to the abyss of a Van Gogh and the way he uses bright colors along with the depth and texture of paint to create light, shadow and direction within his paintings. I love the way you can tell roughly how old Monet was when he painted his canvases depending on how blurry it was. Sure an impressionist painting is made up of many dots and dashes to begin with, but his failing eyesight later in life caused his paintings to become more and more of an impression over time than an actual representation of the subject matter. I love the way you can tell a Degas from the oddly contorted and uncomfortable looking poses the women are often depicted in regardless of their activities. I also love street and environmental photography. I find it almost like a meditation to wander around with my Leica camera attached to my hand like an extended body part and capture the world going on around me. Museums are great places to shoot environmental photography. The architecture and lighting are usually dramatic and tend to work well when it comes to creating imagery. Unless it is otherwise noted, you are allowed to take pictures with no flash in any museum! Aside from the art surrounding you and the there is a whole world of photo fodder at your fingertips. Most art museums are designed to be architectural wonders themselves. By using the shapes or lines within these often breathtaking buildings, you can add a whole new element to your photography. When you are surrounded by such a diverse amount of creativity, you can’t help but to be inspired. And after all, art breeds art, doesn’t it?
Chile 2016 in the Rear View Part 1: Patagonia
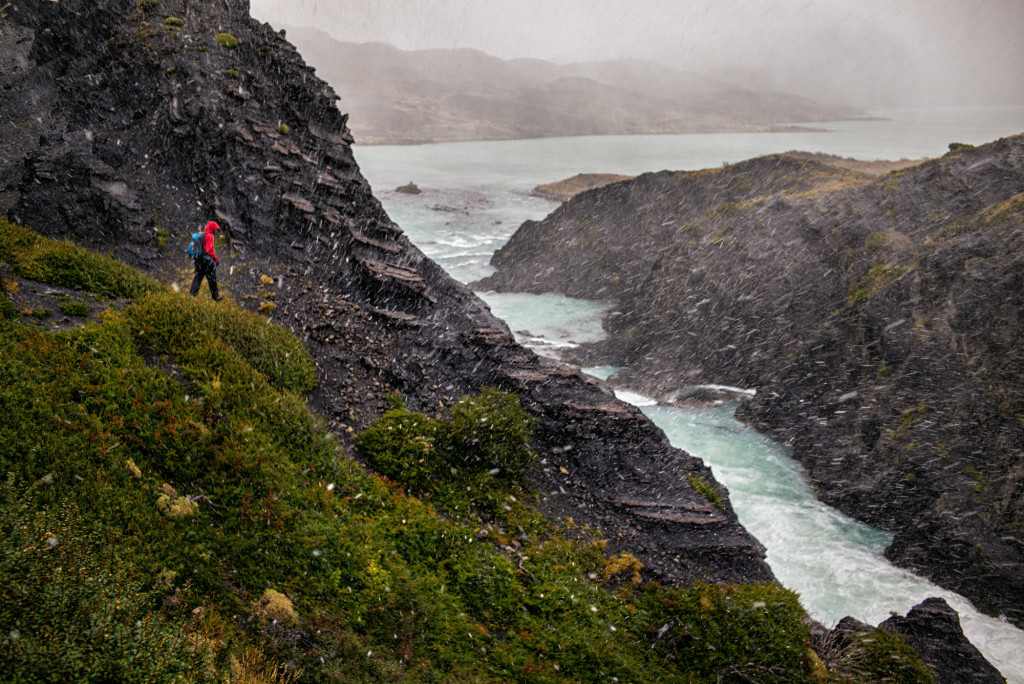
I’ve got to be honest, it’s has been pretty hard to sum up this trip. This was my third time roaming around this incredibly diverse country, but my first time bringing a photography workshop to see this amazing place. During our journey we were lucky enough to see every major animal in Torres del Paine National park and also were graced with some incredible sunrises and sets. The next morning, for our first sunrise the clouds had split and the winds had subsided to a paltry 40-50mph. This ended up bestowing a beautiful sunrise upon us. The winds create waves on the surreal opaque blue waters of Lago Pehoe that can reach multiple feet at times. A little later in the day we headed up into the hills to find some wildlife. One of the more prominent animals in the region is the Guanaco. They are in the camalid family like a llama or a camel and can be found roaming round most of Chile. On our third day we headed out on a boat trip through the icebergs in Lago Grey to approach Glacier Grey. The flat light of the day made the already blue ice of the glacier pop even more. On our way back to the hotel we were incredibly lucky and came across a pair of Huemuls (South Andean Deer). At one point in recent history there were as few as 350 huemuls left alive. Through rigorous efforts of the Argentinian and Chilean governments the population has rebounded to a still critically endangered number of roughly 2500. One of the more elusive animals in Patagonia is the mountain lion. I am lucky enough to know where a few different populations of mountain lions reside within Torres del Paine, so we set out on our last evening to try and capture some images of these amazing animals. After a while of scouring the hillsides without any luck we decided to head back to our waiting van before it got too dark. As we were heading back into civilization a mountain lion passed in our path within 150 ft allowing us to get some great images.
Chile 2016 in the Rear View Part 2: Easter Island (Rapa Nui)
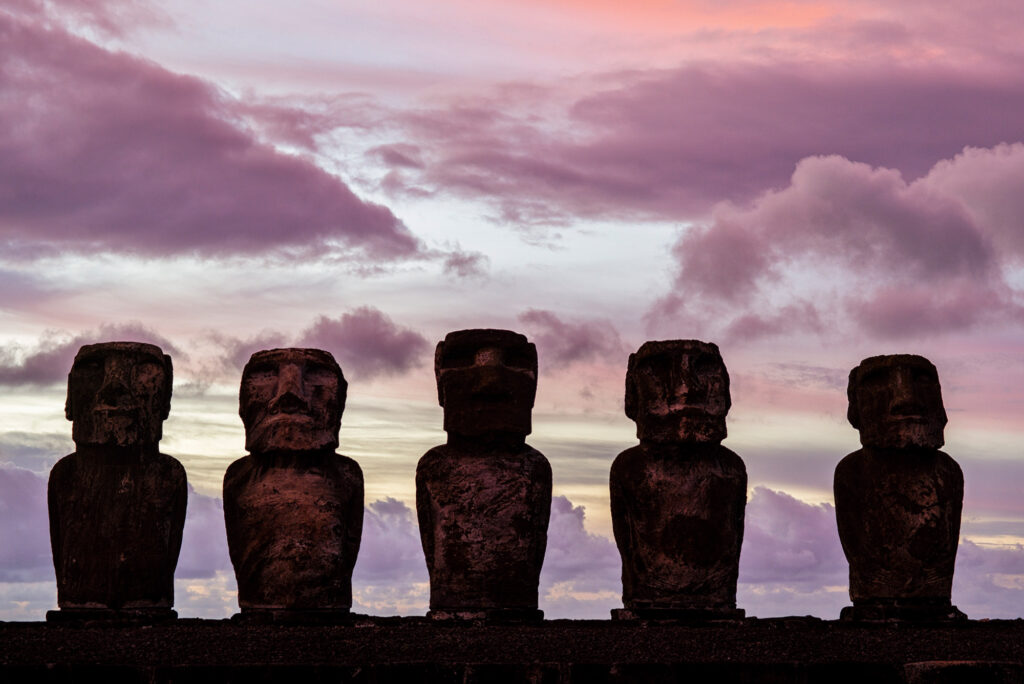
Few places on this vast planet still evoke the mystery of Easter Island (Rapa Nui). There are so many conflicting theories on the statues whose presence overlook the landscapes of the furthest inhabited island in the middle of the pacific, we may never know the truth behind the civilization that lived on this island. Despite all of my travels, this was the first time I made my way to this amazing destination, and I was lucky enough to be able to lead the second part of my Chile workshop there. Being a volcanic island, Easter Island has a vast network of caves and lava tubes. Some of these caves were used at different periods as homes by the ancient inhabitants of the island. You can still see petroglyphs and cave paintings in some areas. The stone used for the different parts of the Maoi was sourced from different places on the island. Most of the statue is made of a solidified volcanic ash. The reddish stone seen on the heads of Moai (known as Pukaus) once they are on their final platforms was carved from a different stone and were meant to symbolize a top knot of hair. Yes, an ancient Man-Bun. (Sorry hipsters, not as original as you thought!)
5 Quick Tips For Better Landscape Photos
There is nothing better than capturing a beautiful sunset or the way the light is catching that cloud during your hike. There is nothing worse than getting back to show your friends or family the grandeur that you’ve witnessed only to present them a photograph that doesn’t come close to representing the display mother nature played out in front of your eyes. By following some simple rules you can increase your likely hood of capturing that amazing scene with your camera that your viewers can’t get enough. For a more in-depth description, click on the blue links. Keep that Horizon Out of the Middle When it comes to composition, maintaining the rules of thirds is a good start to a pleasing appearance. By taking the horizon out of the middle of your image and placing it close to an imaginary line dividing your image into 3 parts, the viewer will usually stay engaged longer in the image. If you have a perfect mirrored reflection in a lake, this could be a great time to throw this rule out the window and use the symmetry you’re being presented with, but in most cases, the rule of thirds is very pleasing. In the image to the left, the foreground (brown area) occupies the bottom third, the clouds another third and the starry sky, the top third. The main features like the arch, tree, and moon all fall along the lines dividing the image into thirds. Use Leading Lines to Draw the Viewers Eye By using elements within your image to draw the viewer’s eye, you can lead them through your photograph to the subject you intended. These are called leading lines. Diagonal lines offer quite a bit to a composition, and by using them within your images you can create a much stronger composition. In this image, many diagonal lines within the composition lead your eye to a central point. Anchor Points Well, you’ve managed to get the viewer to look somewhere in your photo, now how do you keep them looking at it longer and more in depth? After you’ve led their eye somewhere with your strong diagonal leading line, you need something for them to return to. This is where anchor points come in. This is an element of the image that draws you back away from the direction your eye wants to gravitate, allowing you to keep the viewer’s eye moving through the photo. In this image, the pink reflection and light colored rock at the bottom grab your attention to return your gaze from the colorful sunrise over the mountains. Bad Weather Can Mean Great Pictures When storm clouds are heading your way, the first instinct is usually to pack up that camera gear and head inside. Fight the urge I tell you! When the weather takes a turn for the worse, moving clouds can create some dynamic lighting and dynamic lighting can create some stunning imagery. How many rainbows have you seen on a bluebird day? Use Your Shutter Speed to Tell a Story In most cases, this will require a tripod or at least a good stable surface to rest your camera. You have three main elements at your disposal to create the image your mind’s eye is seeing when taking a photograph shutter speed, aperture and ISO. By altering the shutter speed you can determine if the moving water in your shot is displayed as droplets frozen in time or if it takes on a more wispy and painted look. When your shutter is left open for a longer period of time, it is capturing anything passing in front of the lens until it closes. With a longer shutter speed, it will capture all of the movement, in this case, waves crashing over rocks during sunset. Here the longer shutter speed allows the motion of the water to cascade over the rocks in the foreground while it is still fast enough to capture waves in the background.